Connect using SSH keys
The Secure Shell (SSH) protocol uses encryption to secure the connection between a client and a server. All user authentication and file transfers are encrypted to provide the highest possible security.
With SSH keys you connect over SFTP and SSH without entering a password. Keys are also more secure than passwords, because the private key that secures the connection is never shared.
You will generate two keys:
- a public key - this is the key you upload to the Templ Panel
- a private key - stored safely on your computer, never give this out
This is a one-time setup. Once your key is in place, you can connect from any SFTP client.
Step 1: Generate your SSH key
Follow the section for your operating system.
On Mac
You create SSH keys on macOS using the ssh-keygen command in Terminal.
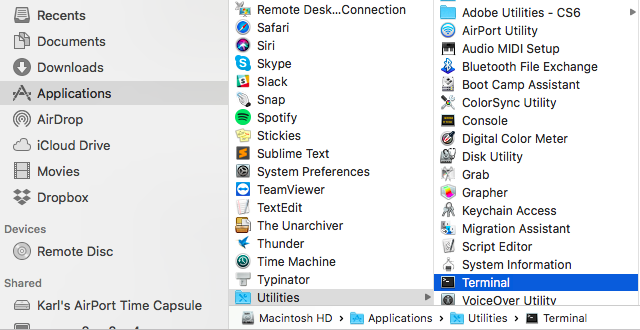
Open the Terminal app. You'll find it in Finder → Applications → Utilities → Terminal. You can also open Spotlight with Command (⌘) + Space, type Terminal, and press Enter.
- Enter the following command in the Terminal window.
ssh-keygen -t ed25519
This generates a modern Ed25519 key - faster and more secure than older RSA keys.
The ssh-keygen utility prompts you to indicate where to store the key.
- Press Enter to accept the default location.
- When prompted for a passphrase, we recommend entering one - it protects the key if your computer is ever compromised, and macOS can remember it in your keychain so you won't have to retype it. You can also press Enter to skip it.
Your identification has been saved in /Users/myname/.ssh/id_ed25519
Your public key has been saved in /Users/myname/.ssh/id_ed25519.pub
Your private key is saved to the id_ed25519 file in the .ssh directory.
You should never share your private key with anyone.
Your public key is saved to the id_ed25519.pub file. Copy it to your clipboard with:
pbcopy < ~/.ssh/id_ed25519.pub
You'll paste this into the Templ Panel in the next step.
On Windows
Modern Windows (Windows 10 and later) has OpenSSH built in, so you can generate a key exactly like on Mac: open PowerShell (or Windows Terminal), run ssh-keygen -t ed25519, and follow the same prompts as in the Mac section above.
Your public key ends up in C:\Users\<you>\.ssh\id_ed25519.pub - open it in Notepad and copy the contents.
If you prefer a graphical tool, you can use the PuTTYgen utility instead, which is installed alongside PuTTY:
Step 1 - Download PuTTY from this link. Under Package Files you'll find the download links. There are two versions available (32-bit and 64-bit).
If you're unsure which to download, check whether your Windows is 32-bit or 64-bit: right-click This PC or My Computer, select Properties, and check your System Type.
Step 2 - When you install PuTTY, the PuTTYgen utility is installed too. Open PuTTYgen; it looks like this:
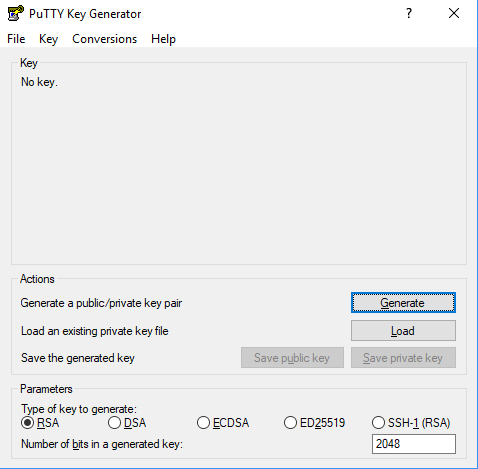
Step 3 - Under Type of key to generate select EdDSA (Ed25519), then click Generate and wait for the process to finish.
When it's done, it should look similar to this:
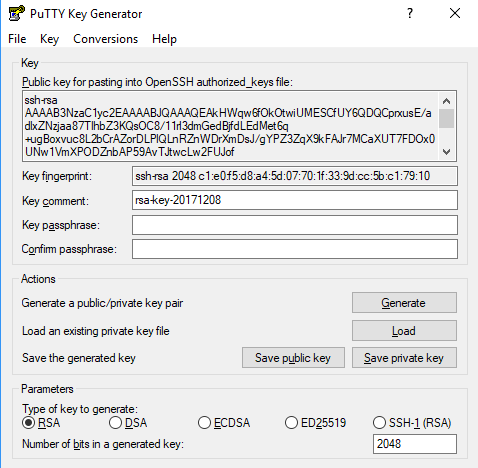
Step 4 - Optionally enter a Key passphrase (recommended), then click Save public key and Save private key, and save them in a new folder of your choice, preferably somewhere they won't get deleted by accident.
Step 2: Add the key to the Templ Panel
Open the Templ Panel, then click File Access → Access Key → Create.
- Give your access key a name that identifies you and your device, for example "Karl Mac".
- Paste your public key into the key field.
- On Mac, paste with Command (⌘) + V. If you need to copy the key again, run
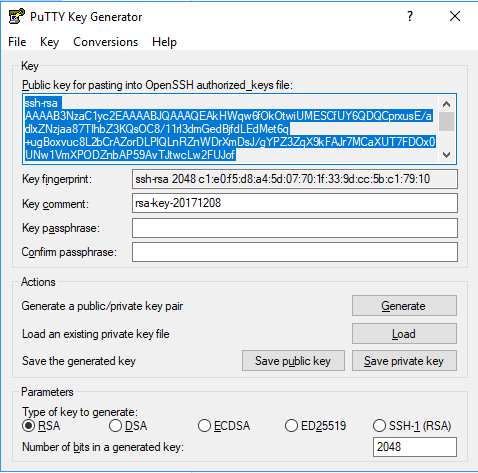
pbcopy < ~/.ssh/id_ed25519.pubin Terminal. - On Windows, copy the public key first: in PuTTYgen, right-click the text under Public key, choose Select All, then Copy. Paste with Ctrl + V.
- On Mac, paste with Command (⌘) + V. If you need to copy the key again, run
- Add to All - we recommend checking this box so your key works with all your websites, in case you have more than one.
- To limit the key to a single website, uncheck Add to all and select your website in the dropdown.
When you're done, it should look similar to this:
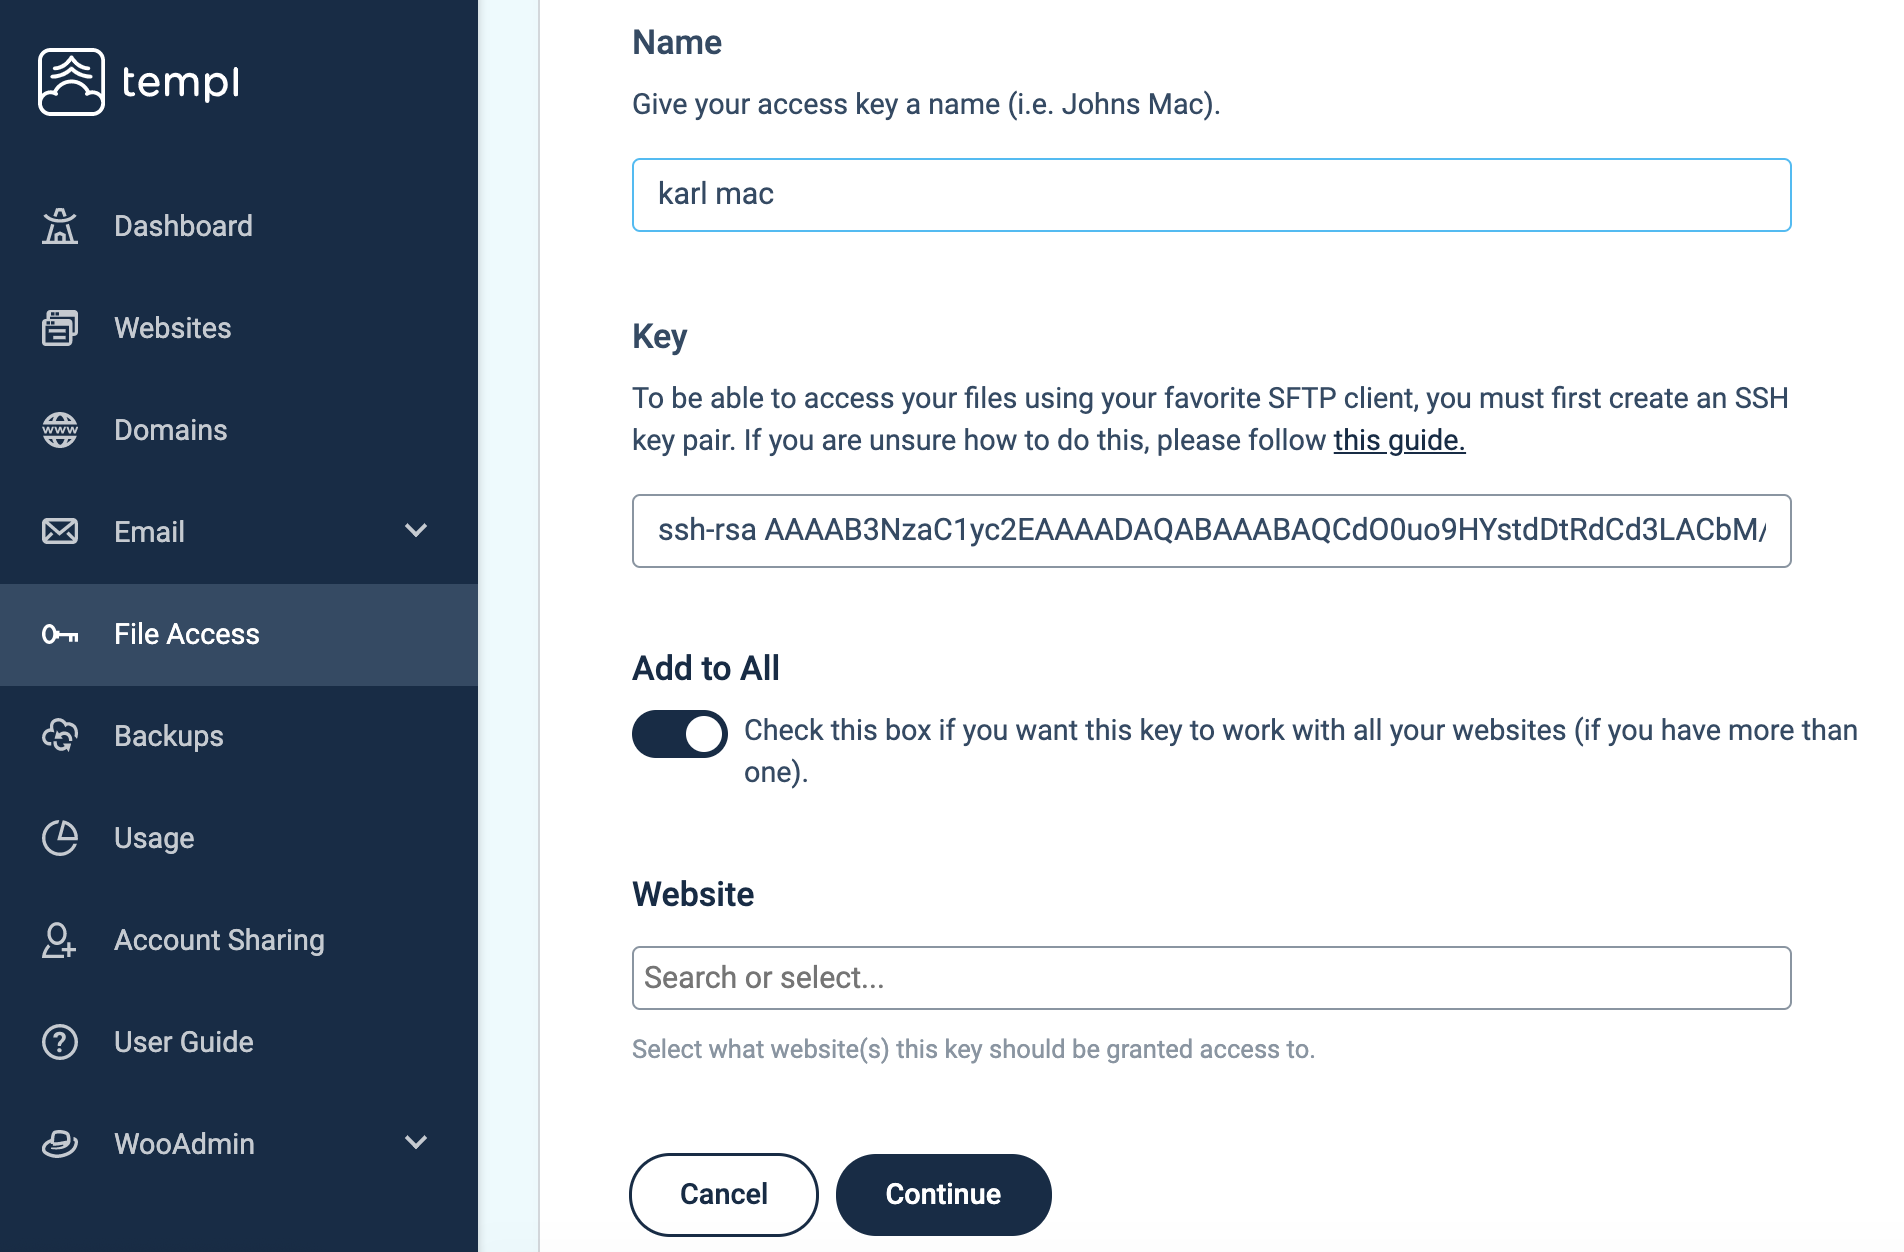
Click Continue and you're done with this step.
Step 3: Connect with your SFTP client
Now that your key is added to the Templ Panel, set up your SFTP client. We'll use FileZilla in this example, but you can use any SFTP client.
Download and install FileZilla from filezilla-project.org. Open it, click the Site Manager icon in the top left, then New Site.
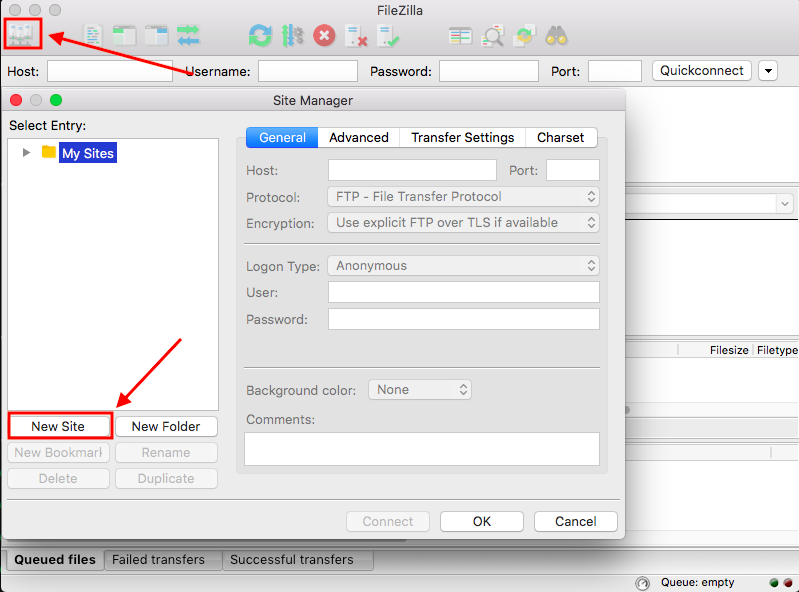
On the General tab, enter the following:
Host: Your domain (yourdomain.com)
Port: Your port (shown in our panel)
Protocol: SFTP - SSH File Transfer Protocol
Logon Type: Key File
User: The SFTP username, displayed on the Overview page in our panel.
Key File: The private key you generated (id_ed25519 on Mac; your saved private key on Windows).
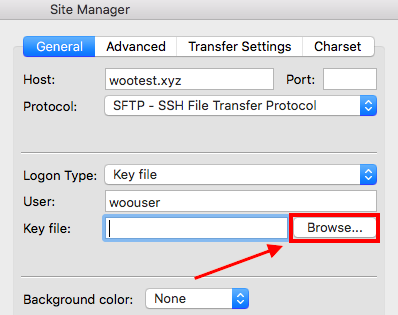 Then press Command (⌘) + Shift + G and enter the path
 ~/.ssh: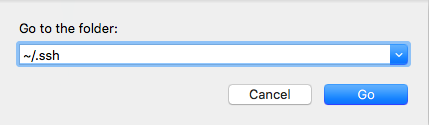 Click Go, select id_ed25519, and click Open. Be sure to select
 id_ed25519 (not the .pub file) if there are other files in the folder.Depending on your FileZilla version, you may be asked to Convert the key file. Click Yes and save the converted key. If your key is password protected, you'll be prompted for that password.Verify the connection
The setup is now complete and should look similar to this, but with your own website details:
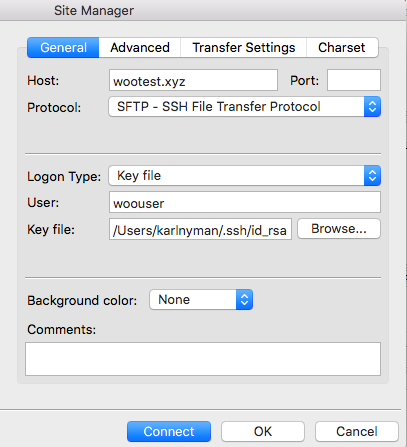
Click Connect and make sure file access is working. If FileZilla shows a host key message, click OK to continue, or Always trust to skip it in the future.