Disk storage
Each website has its own disk space, included in its plan. This article explains what counts toward that space, what happens when you go over it, how automatic upgrades work, and how to add more disk space manually.
How disk storage works
Disk space is allocated per website. The following all count toward it:
- Website files, including everything in
wp-content/uploads - The database
- Local backups
- Log files
Daily remote backups do not count toward your disk space - only local backups stored on the same server as your website do.
A website and its staging environment share the same disk space. A staging site's disk usage counts toward the same plan as its production site, so both environments draw from the one allocation.
Reported disk usage in the Panel is updated with a slight delay, so freed-up space may take a minute or two to show after you delete files or backups.
If you're running low on space, you can either reduce your disk usage or add more disk space. See our price list for the price per extra GB.
Overage
At Templ, you can temporarily exceed the disk space included in your plan. A website can use up to 100% more storage than its plan includes at no extra charge.
When a website goes into overage, an email is sent to the account holder.
Automatic disk upgrades
If a website's usage stays over its included disk space for more than seven days, its disk space is upgraded automatically. This adds more storage to the website as a separate billable item, so that site's monthly cost increases accordingly. An email is sent to the account holder when an automatic upgrade happens.
If there is an outstanding payment on the account, an automatic disk upgrade can fail. In that case the site remains in overage and may stop functioning, so it's important to keep payments up to date.
Add disk space manually
You can add more disk space to a website at any time, without upgrading to another plan.
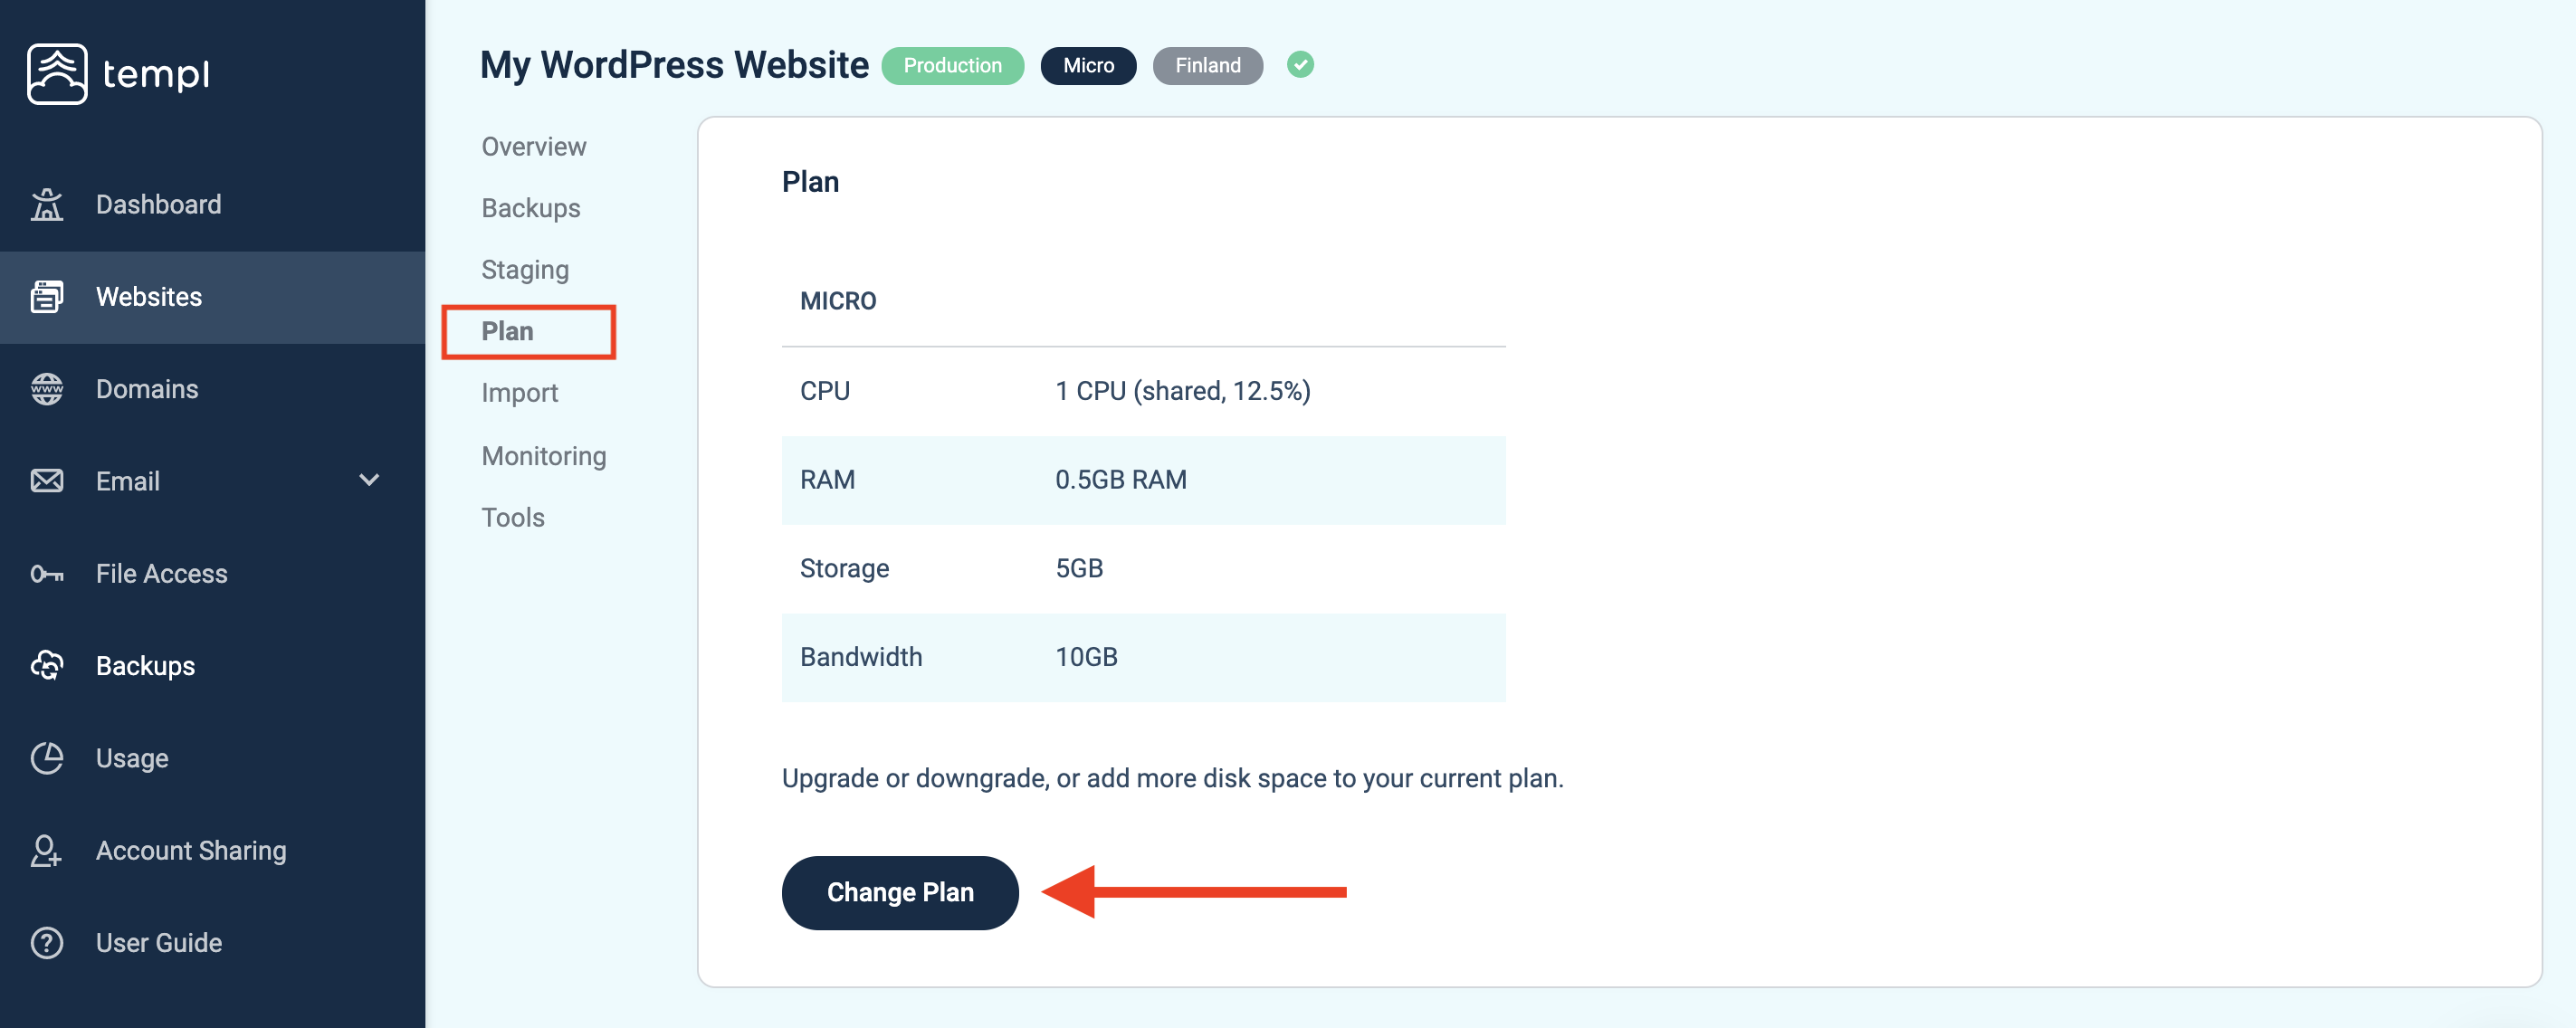
Navigate to the website details page of the site you want to add more disk to. Click on Plan, as shown below, and then click on Change Plan.
On the next page you will choose how much disk space you want to add. Since this is for increasing the disk space only, you should not change the Website Plan unless you want to upgrade to another more powerful plan.
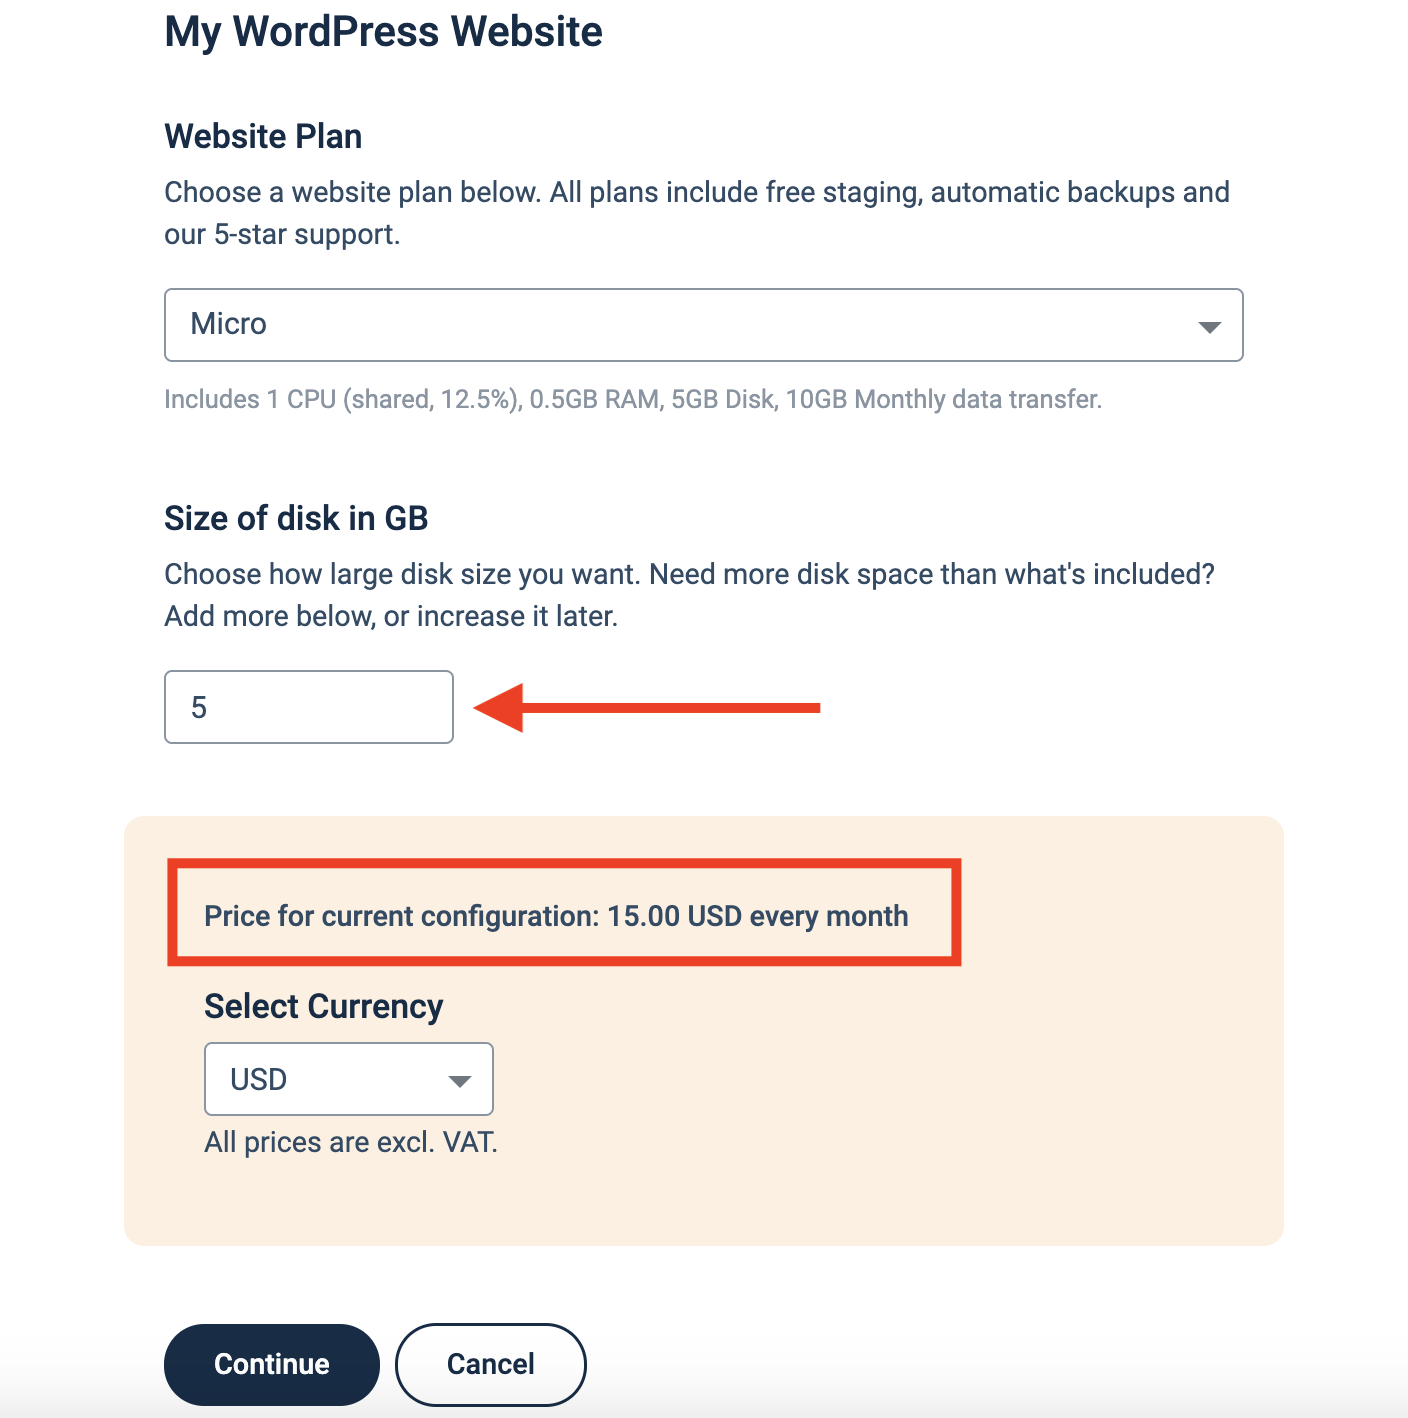
You can add as much disk space as you need. The disk space can be downgraded later on if needed.
When you are done, click Continue and complete the payment steps. After that, you will be asked to confirm the changes that are about to be made (re-sizing of the disk). Confirm the changes and wait a few seconds for your disk to be increased.
Running out of space?
If you'd rather free up space than pay for more, see Reduce disk usage for ways to check and lower your website's disk usage.