Migrate with Duplicator
This guide will teach you how to migrate an existing WordPress site to Templ using the Duplicator plugin, step by step.
Export your website with Duplicator
This first step is done directly in WordPress on your old host. Here you prepare your website with Duplicator so you can easily import it into Templ afterwards.
Step 1 Open the WordPress site you want to migrate and log in to WP Admin.
Step 2 In the left menu, click "Plugins" and then "Add new" and search for "Duplicator", and install and activate the plugin.
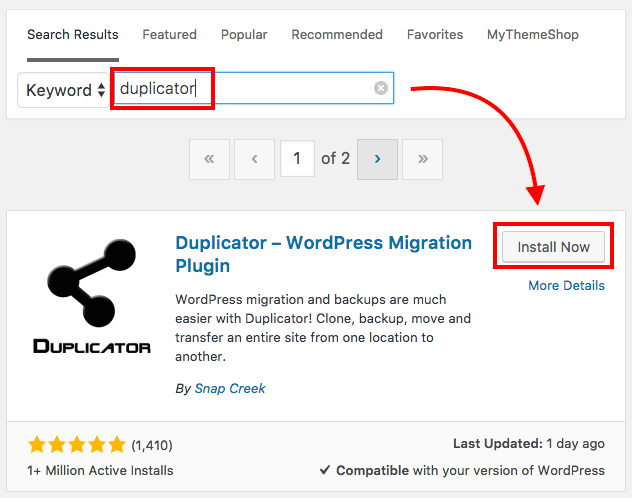
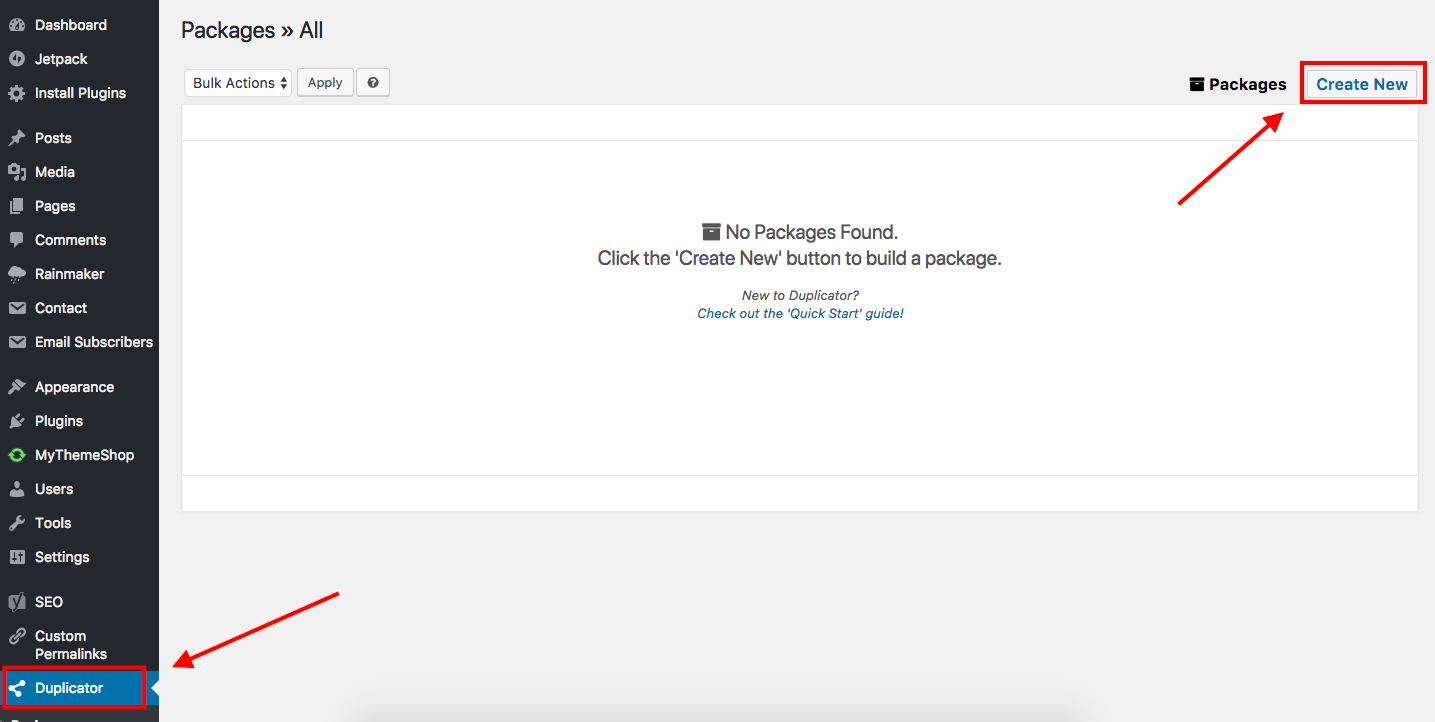
Step 3 Open the Duplicator plugin and then click "Create New" next to Packages.
Step 4 Leave everything default and click "Next".
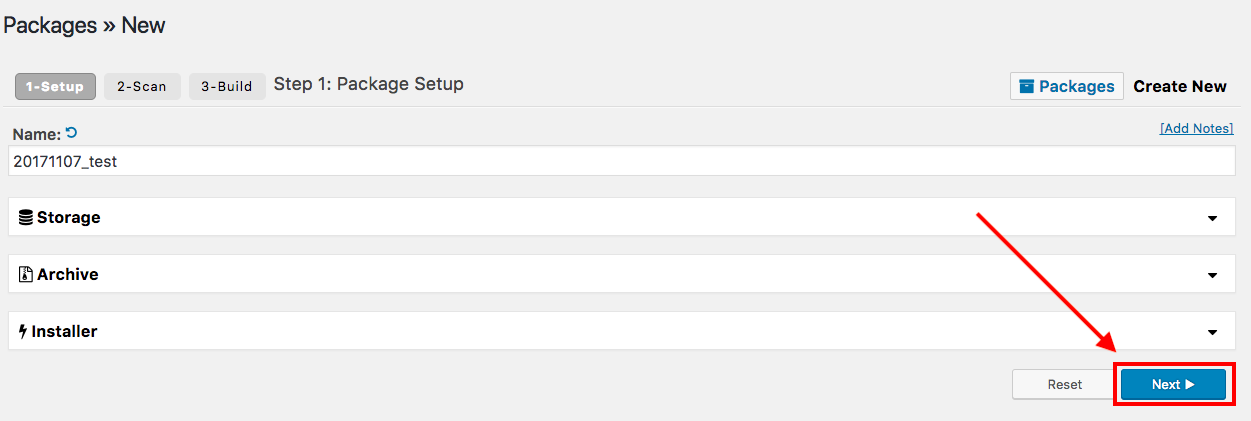
Step 5 After you click Next, then Duplicator will start scanning your website, this may take a few minutes.
If all is well, go ahead and click "Build" as shown below, and wait for the process to finish.
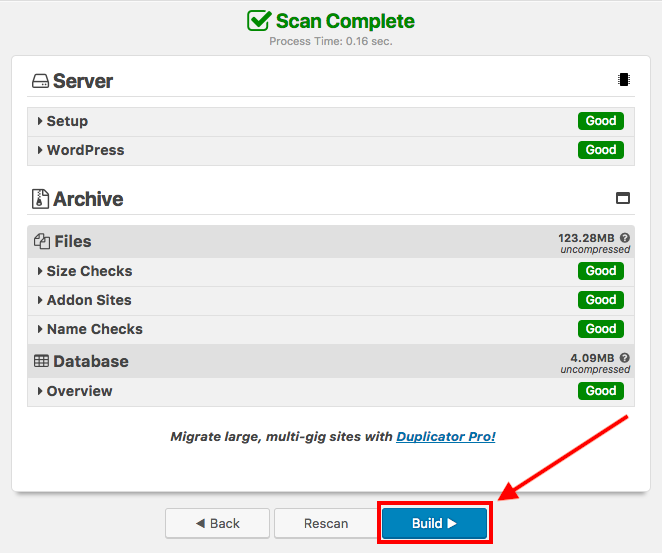
In the rare case that Duplicator fails to build the package, please try again.
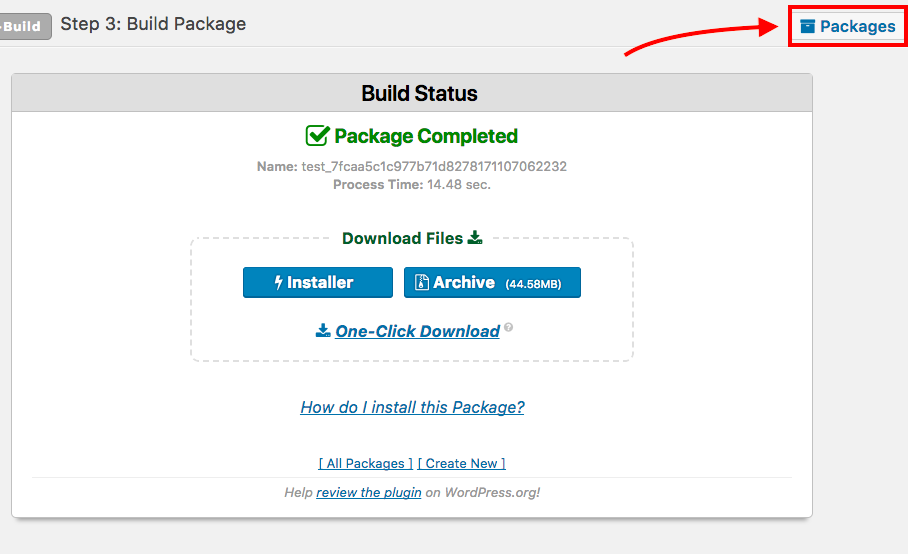
Step 6 Once the process has finished successfully, click on the "Packages" button in the top right, as shown below:
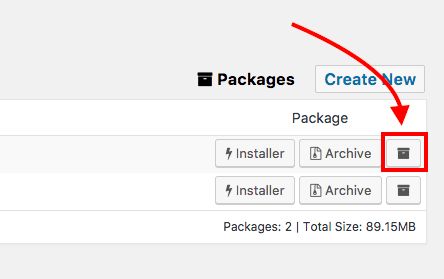
Step 7 Locate the package you just created, you will most likely only have one package in the list, find it and click the "Package details" icon as shown below:
Step 8 Now we need to copy the link to the package, the link that is called "Archive", use the screenshot below as a reference, and right click your link and choose "Copy link address".
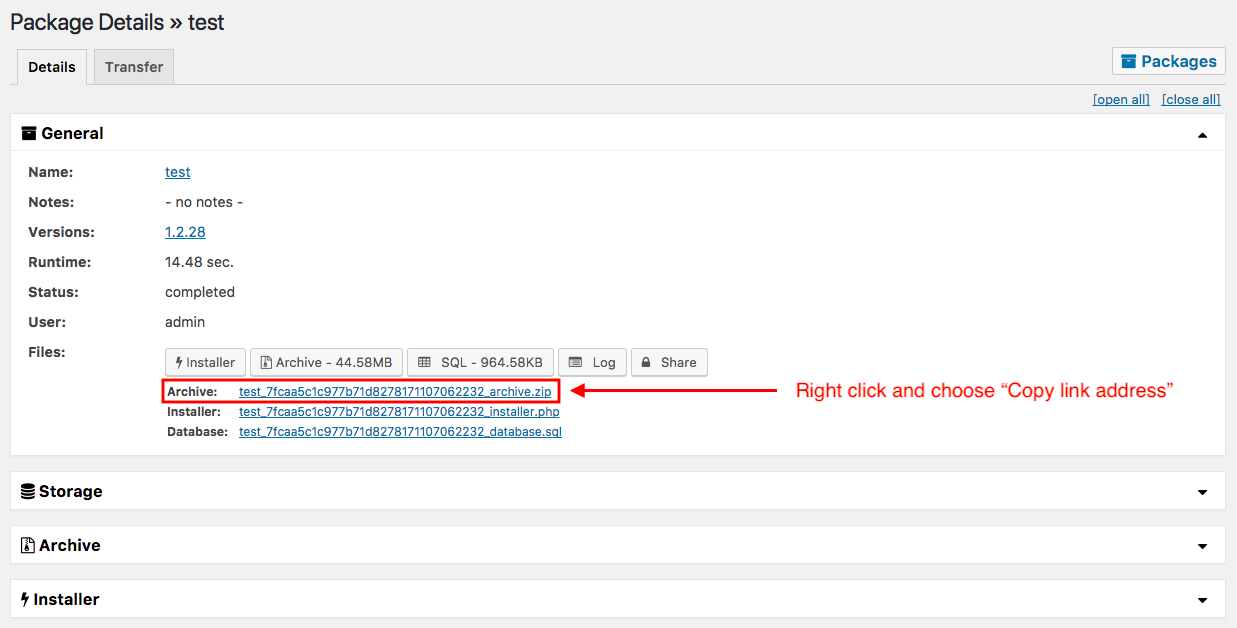
The link should end with _archive.zip. Now we are done in Duplicator, and done with the exporting phase.
.zip archives. The free version of Duplicator produces a .zip archive, which works. Duplicator Pro's proprietary .daf format is not supported.Import your site into Templ
You can import your Duplicator archive either into a brand new website or into an existing website on Templ.
Import into a new website
Use this when you want the migrated site to become a new website on Templ.
First create a new website in the Templ Panel if you haven't already. Then click Websites in the navigation menu, click on the website you just created, and then the Migrate Website button.
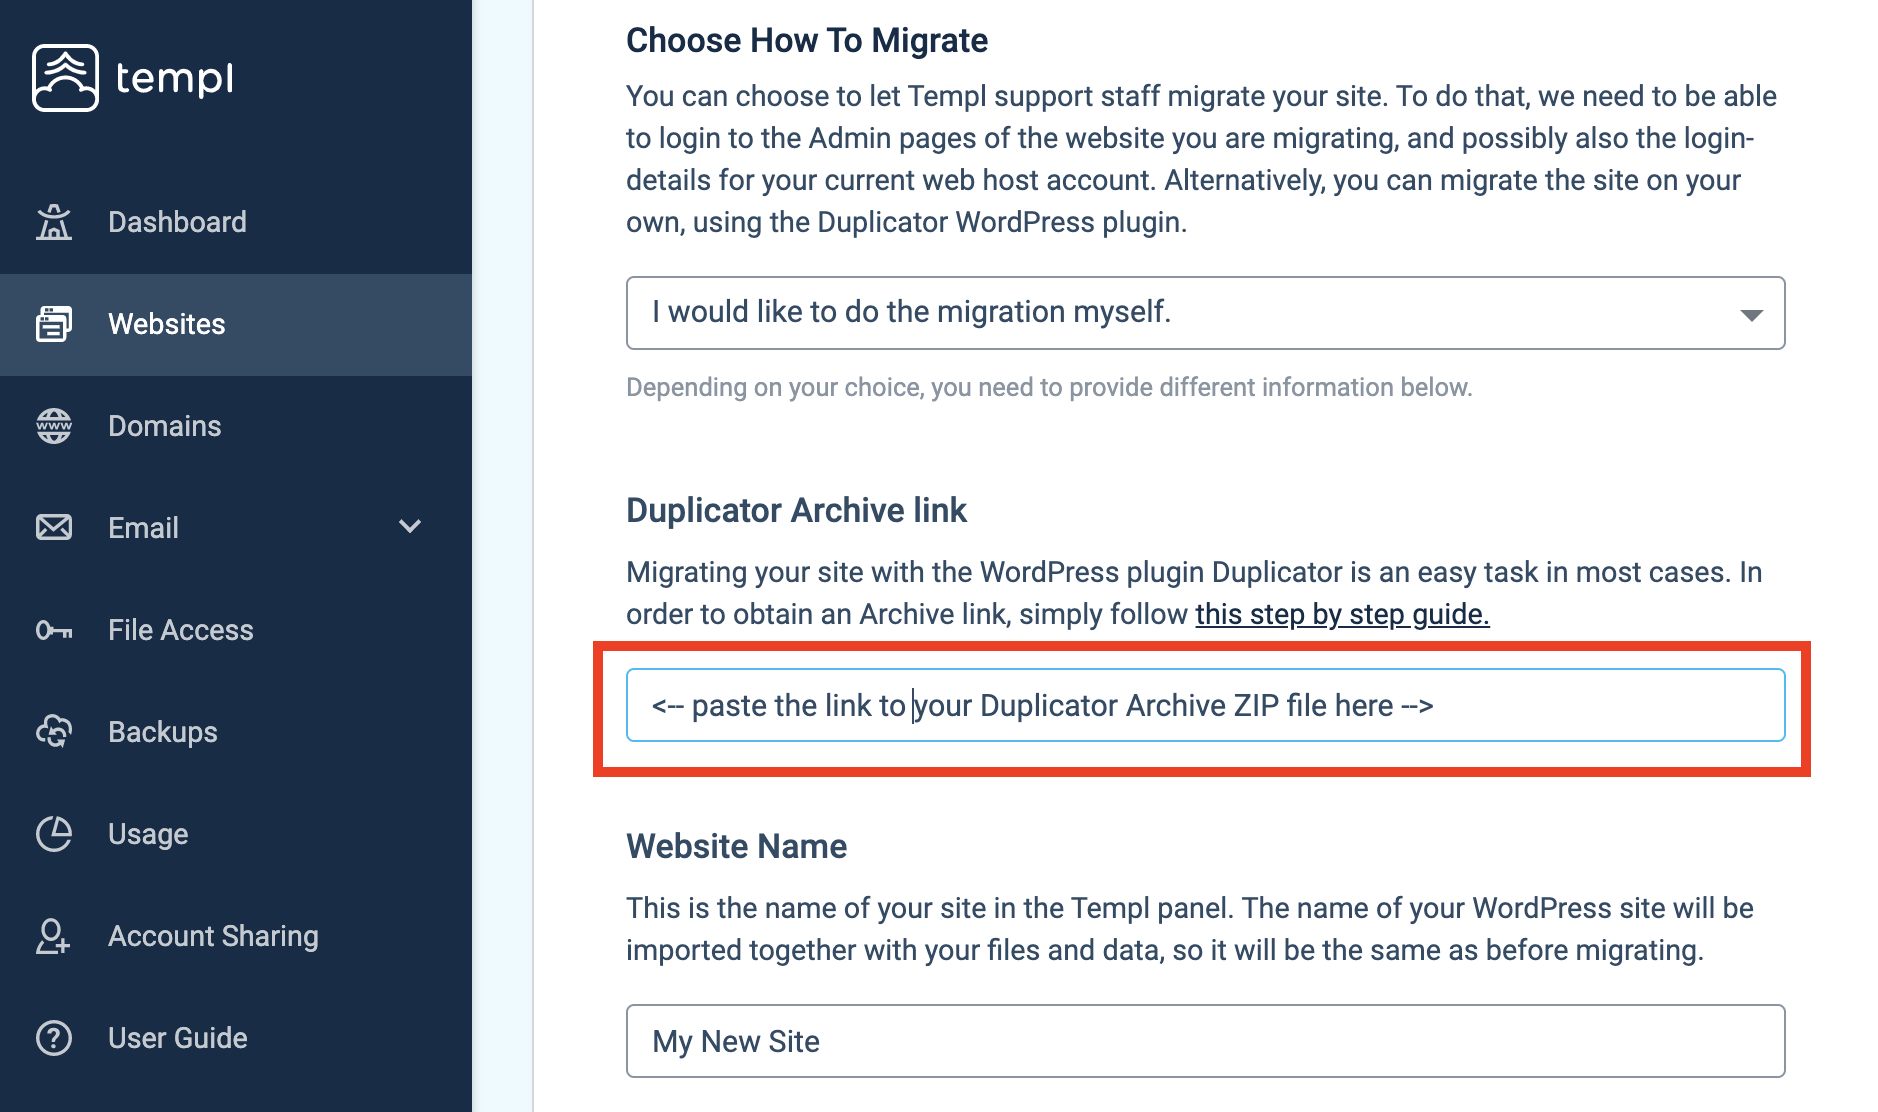
- Duplicator Archive link: Paste the Duplicator link that you copied in Step 8 of the export phase.
- Website name: Give your website a name of your choice. (This is only for the Templ Panel and won't change the name of your website.)
- Website Location: Choose where you want your website to be hosted.
After you click Continue, the import will begin. How long it takes depends on the size of your website, so please be patient as it may take several minutes.
When the import has finished, click Continue to go back to your website details, and click the Homepage button to make sure your website was migrated to Templ correctly.
Import into an existing website
Use this when you want to overwrite an existing website on Templ with your Duplicator archive.
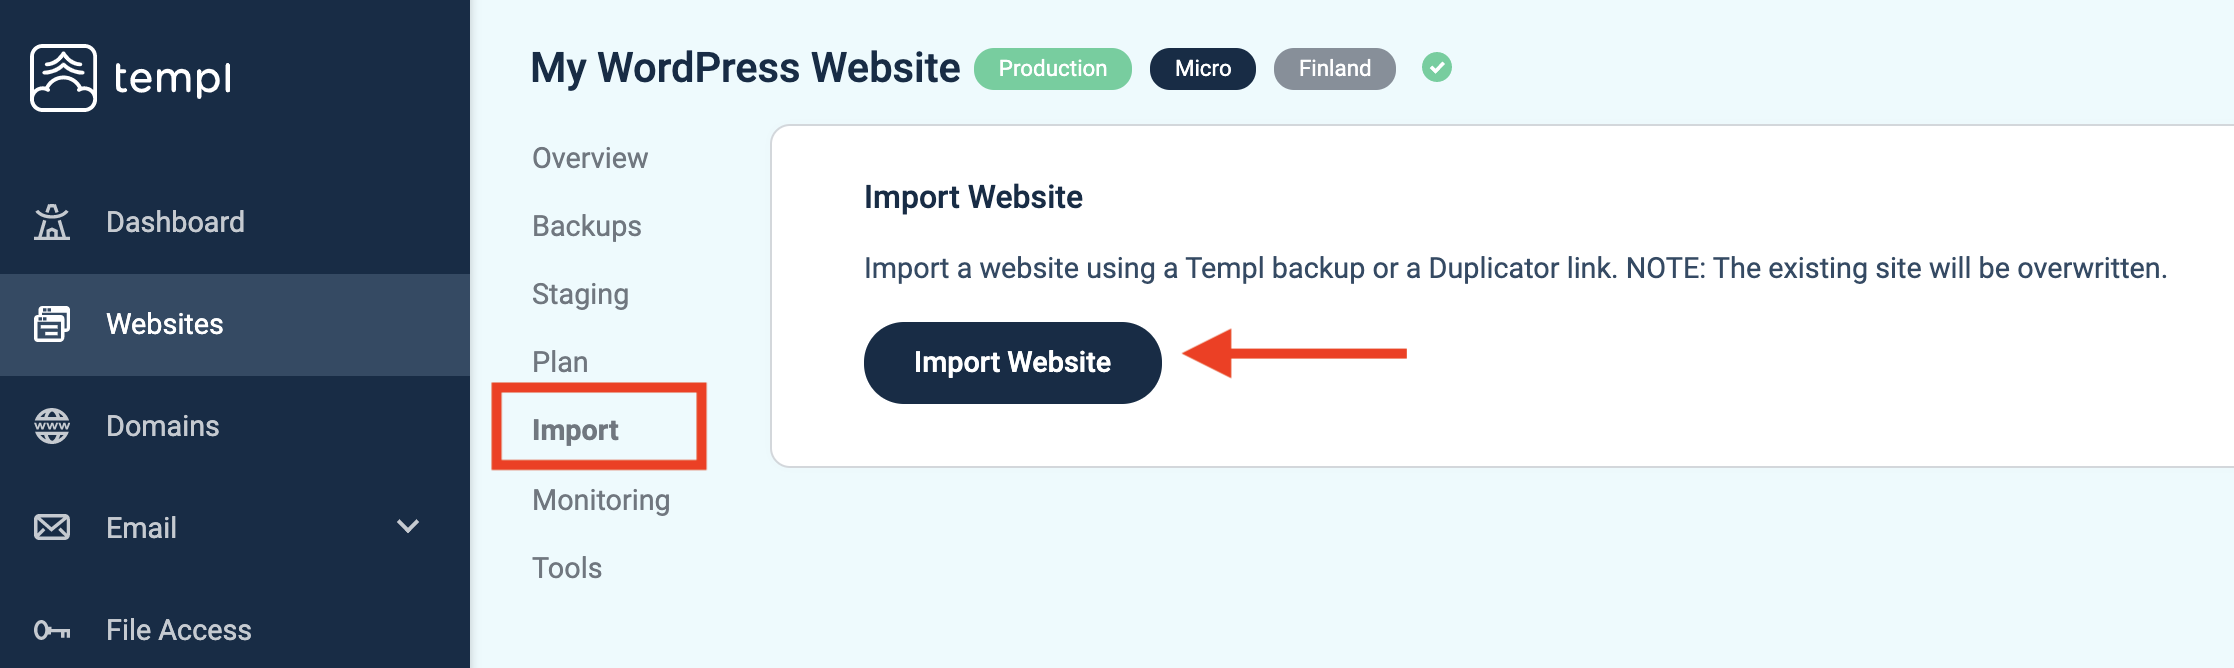
In the Templ Panel, click Websites in the left panel, click on the website you want to import into, and then click the Import menu.
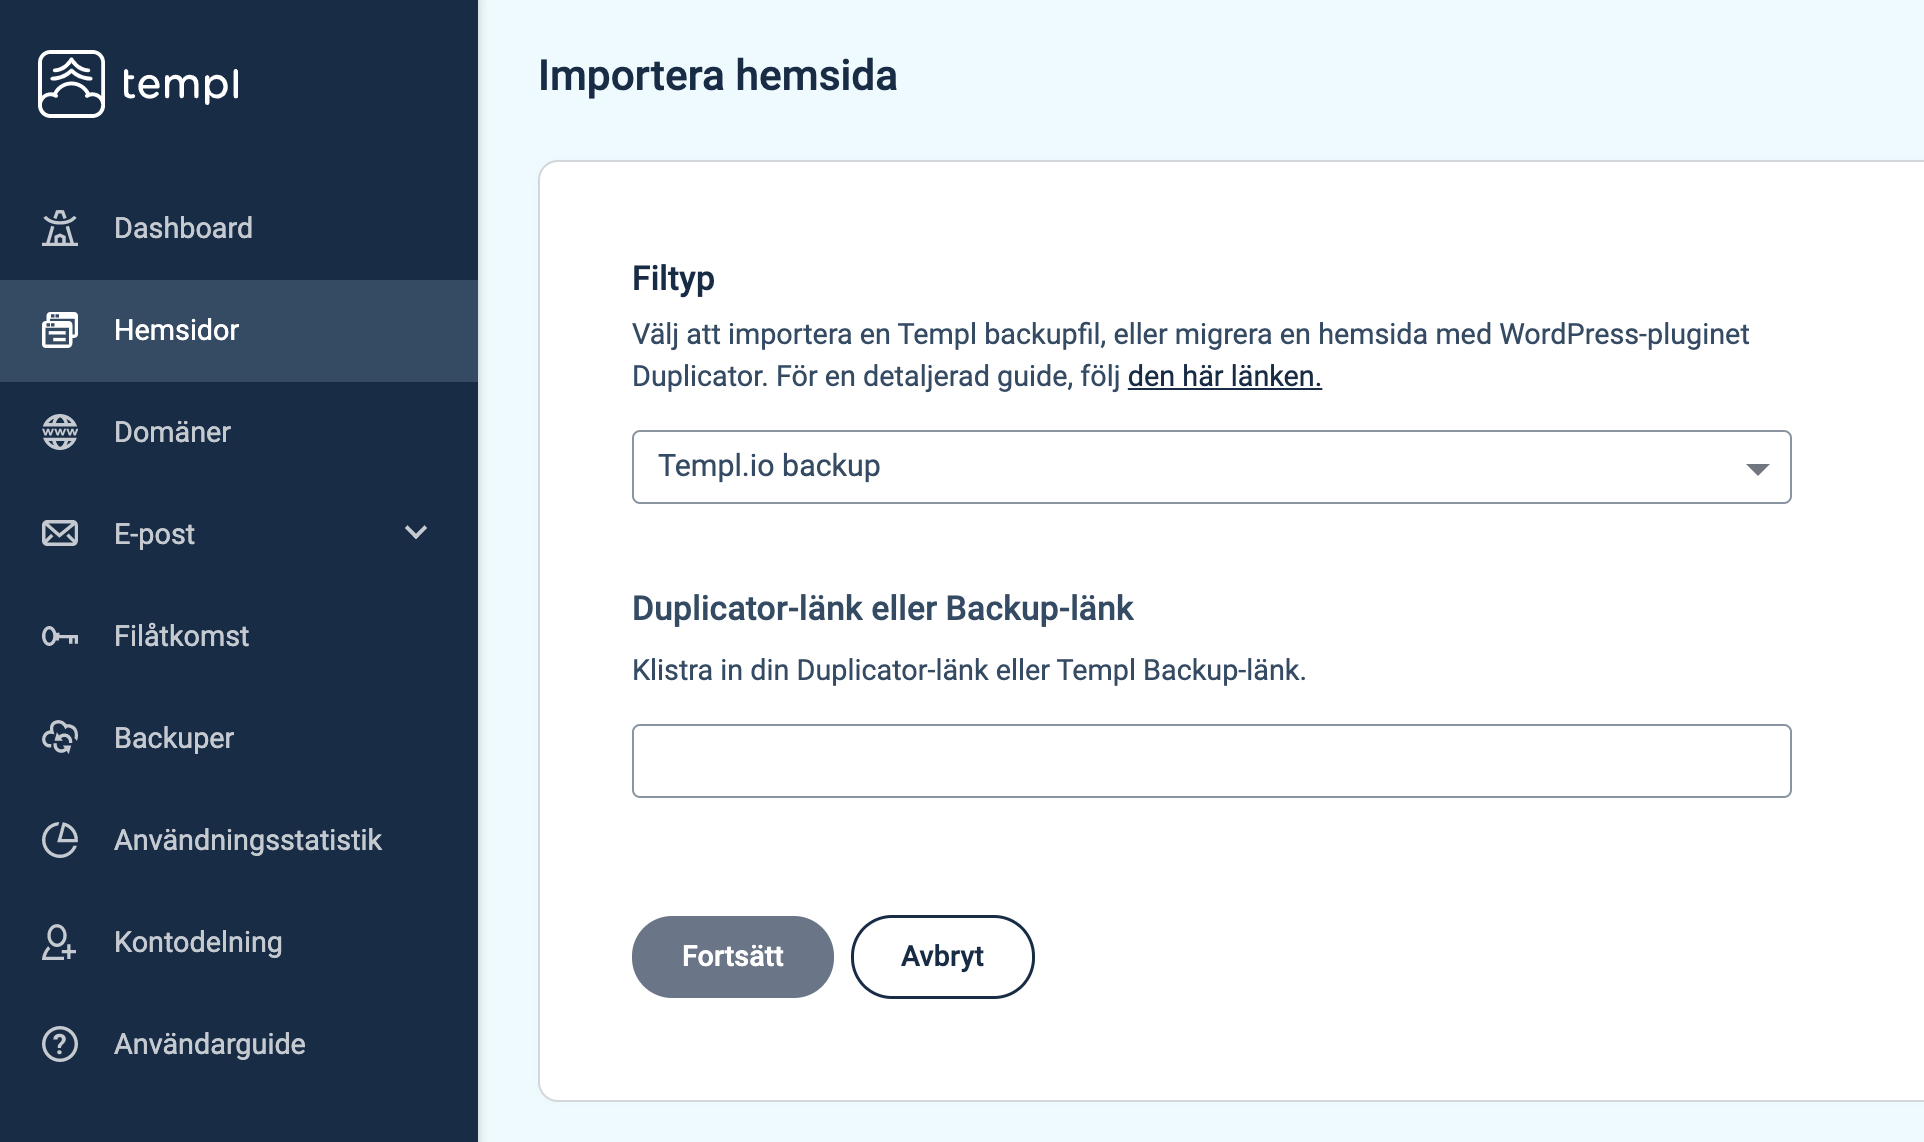
Change Type of File to Duplicator, paste your Duplicator archive link in the URL field, and click Continue.
When the import has finished, click the Homepage button to verify the site imported correctly.
Import from a local file
If you already have the Duplicator archive on your computer, you can upload it to your site and import it from there.
- Upload the file to your Templ site with your SFTP client, for example to
/home/user_xxxx/. See Enable SFTP/SSH password & connect to your site. - In the Templ Panel, open the website and click the Import menu.
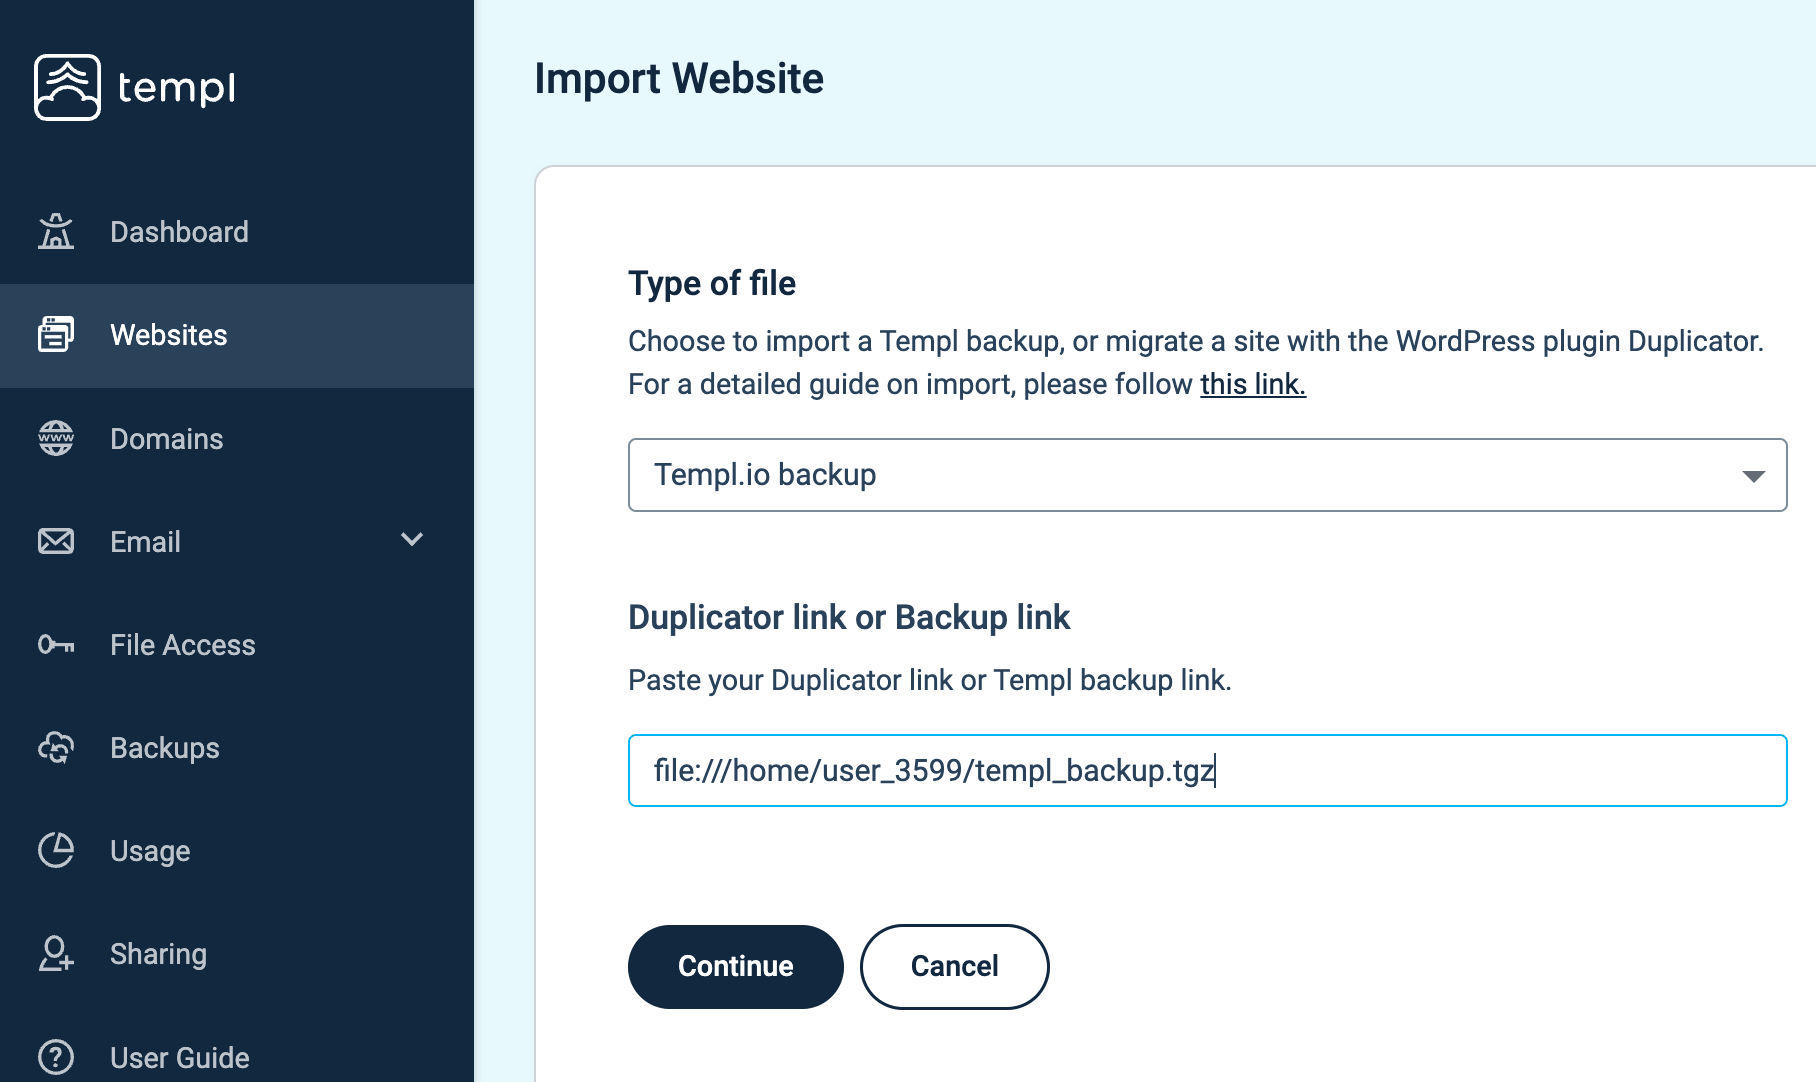
- Change Type of File to Duplicator and, in the URL field, enter
file://followed by the absolute path to your file, for examplefile:///home/user_3599/my_archive.zip. Click Continue.
If the import fails, contact support and we'll help you solve it.
Go live
Once you've verified the imported site, connect your domain: add your domain to the Templ Panel, assign it to the website, and update your name servers to point to Templ. If you want to keep email and other DNS services where they are, change only the A-record instead.