SPF and DKIM
When sending emails from your own domain name, you as the domain owner have to declare which mail servers are allowed to send emails using your domain. This is an important security measure to prevent "spoofing" and unauthorized parties sending emails using your domain name.
This is where SPF and DKIM come in. They are special DNS records that tell the world which mail servers you trust to send emails using your domain.
Configure SPF and DKIM
To set the correct SPF and DKIM for your domain, log in where you manage your domain's DNS settings and add the following records:
SPF
- Name: @
- Type: TXT
- TTL: 300
- Value:
v=spf1 include:spf.wootemple.com include:sendgrid.net ~all
DKIM
- Name: mail._domainkey
- Type: TXT
- TTL: 300
- Value:
v=DKIM1; k=rsa; p=MIGfMA0GCSqGSIb3DQEBAQUAA4GNADCBiQKBgQC5MKmb1rjplGX4tKwXaVfNes8Lr3DYg83CS/nf/nfeO+hKpVZDxKnOfnBJayxP4CAerVzRSxxdfIv2Q2U3C/51X1cbWM6QKQDzk3JGQEIcRnTmx3x5a7aeOCmd2psrgXki32rYchYgq7hF/4YsEnGUf9LqVE+4k+F6xu6oj51QIwIDAQAB
If you already have an SPF record
A domain can only have one SPF record.
If you already have SPF configured for another mail service, do not create a second record - instead, add our two include: entries to your existing record.
For example, if your current record is:
v=spf1 include:_spf.google.com ~all
change it to:
v=spf1 include:_spf.google.com include:spf.wootemple.com include:sendgrid.net ~all
Keep your existing entries and the closing ~all - just insert the two new include: entries before it.
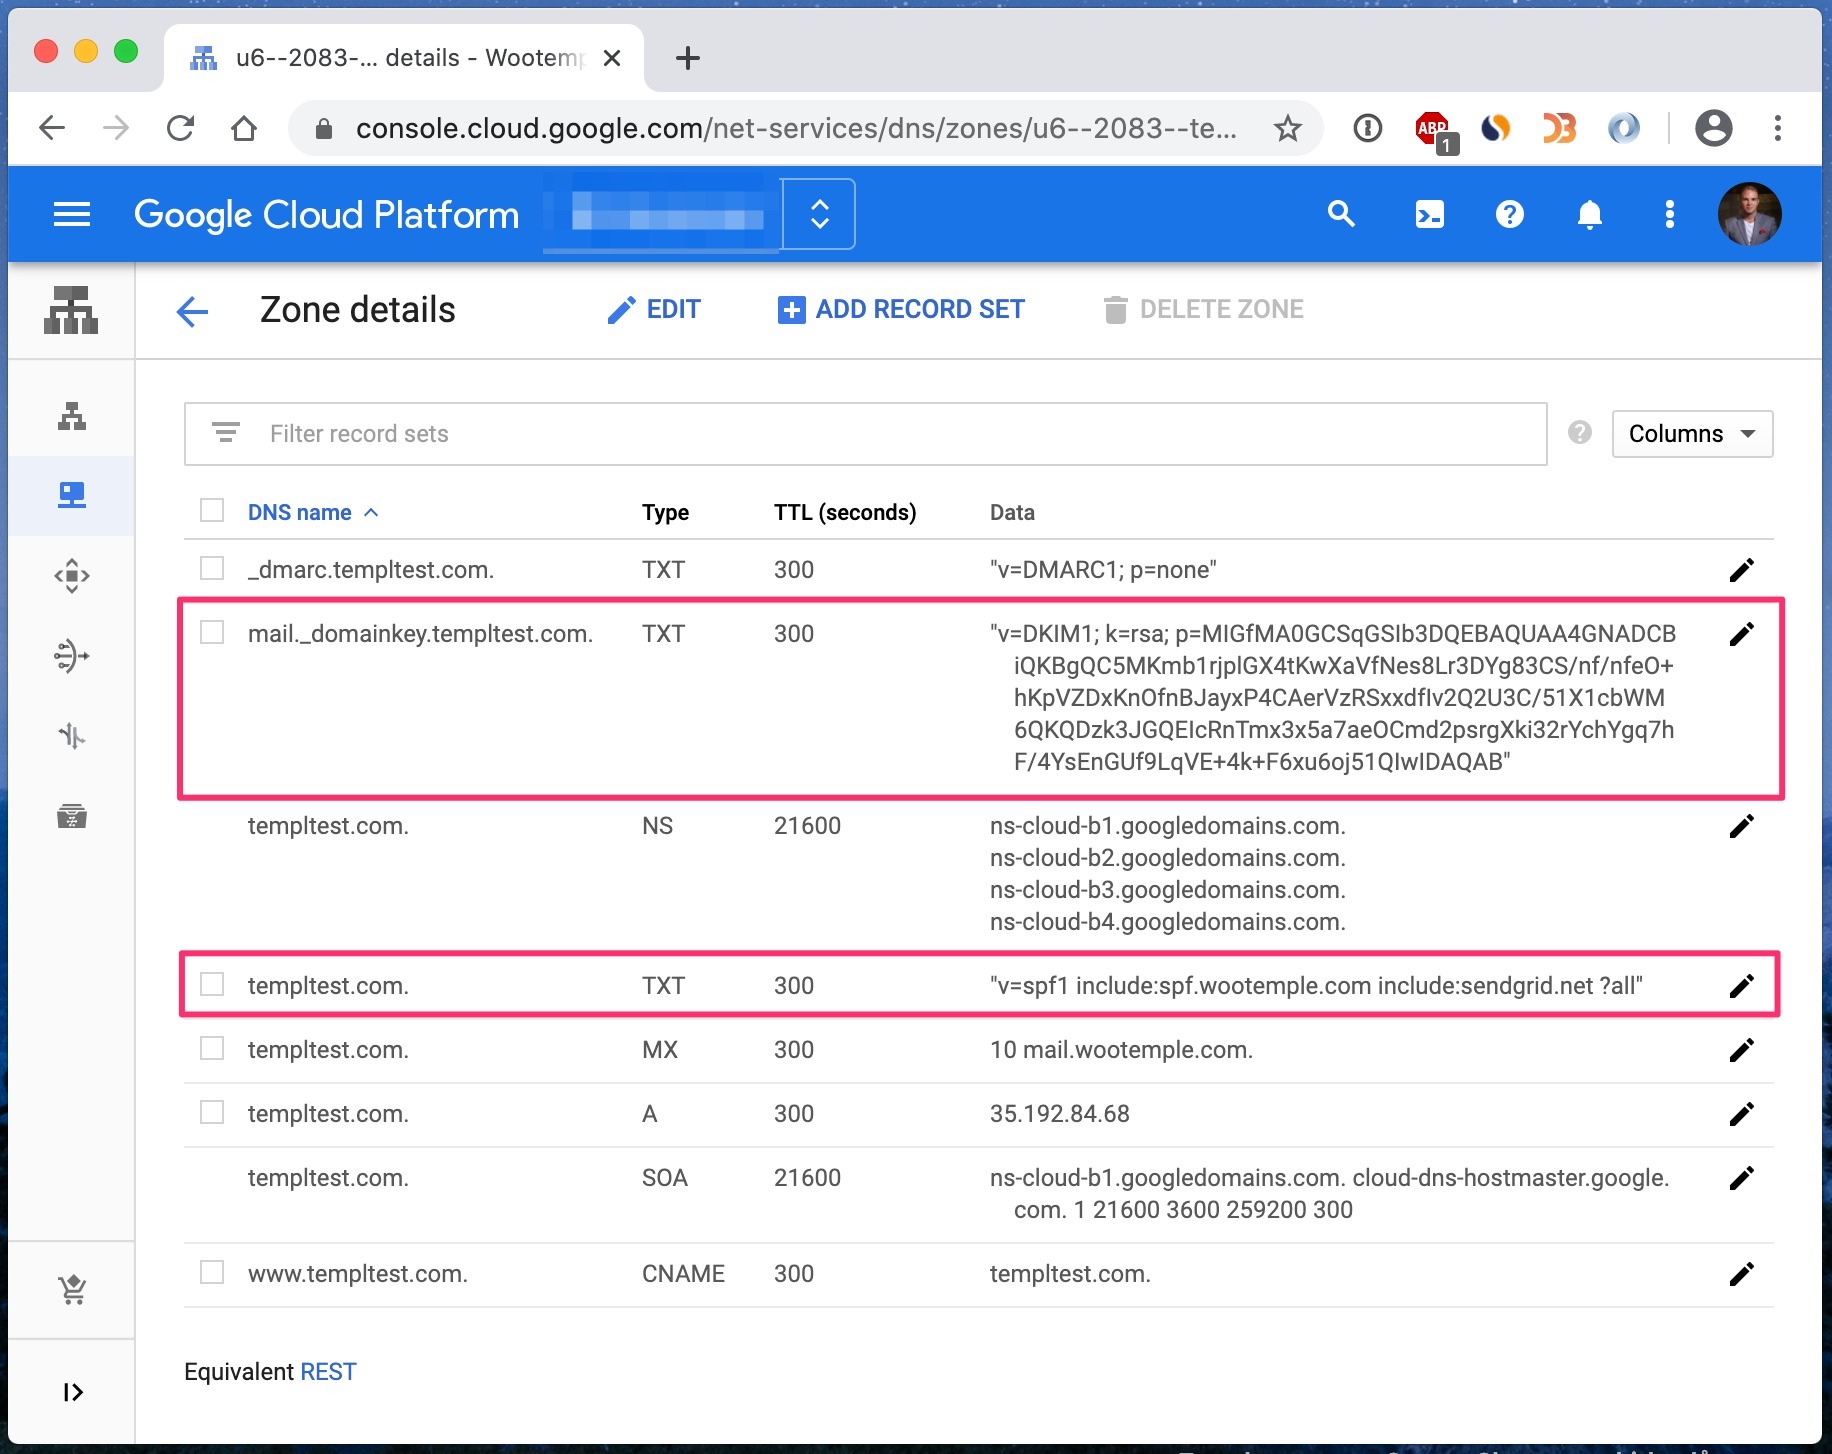
Once correctly configured, your DNS settings should look something like this:
Verify that it works
After the DNS changes have propagated (usually within an hour), confirm that emails from your site pass SPF and DKIM. Follow Email deliverability and domain verification to send a test email and check the results, or use a free tool like mail-tester.com.